Introduction
Copying files between folders in Windows can be tedious if done manually, especially when handling repetitive tasks.
Using Excel, you can automate this process with VBA by copying specific Excel files from one folder to another.
This guide will demonstrate how to set up VBA code to automate file transfers, break down the code, and provide troubleshooting tips for .xlsm and .xlsx file types.
Setting Up Excel and Enabling the Developer Tab
To begin using VBA in Excel, you need to enable the Developer tab, which gives you access to the tools required to work with macros.
Step 1: Install Excel
If you don’t have Excel installed on your PC, download and install it from the Microsoft website or a trusted software provider.
Step 2: Enabling the Developer Tab
- Open Excel and click on File in the top-left corner.
- Then Scroll down and click on Options.
- So In the Excel Options window, click Customize Ribbon from the left sidebar.
- Then On the right side, check the Developer option and click OK.
Step 3: Opening the VBA Editor
Now that the Developer tab is enabled, you can insert the VBA code:
- Click on the Developer tab.
- Click on the Insert button, then select Button (Form Control) from the dropdown.
- Then After inserting the button, a window will appear to assign a macro. You can either choose an existing macro or create a new one.
- So Double-click on the button, or click Macros from the Developer tab, and choose Edit to open the VBA editor.
- Then Paste the provided VBA code inside the editor and click Save.
Code Breakdown
Step 1: Declaring Variables
FIrstly We start by declaring the variables that will store the source and destination paths.
    Dim FSO As Object
    Dim Source_File As String
    Dim Source_Folder As String
    Dim Destination_Folder As String
FSO: This holds the FileSystemObject, which is used to work with files and folders.Source_File: Holds the name of the file to be copied.Source_Folder: Defines the folder from which the file will be copied.Destination_Folder: Defines the folder where the file will be placed.
Step 2: Assigning Paths to Variables
Next, we assign the specific file name and folder paths to the variables.
   Source_File = "excelVba_firstClass.xlsm"
    Source_Folder = "C:\Users\Micheal\Desktop\initialFol\"
    Destination_Folder = "C:\Users\Micheal\Desktop\dasFol\"
Source_File: Specifies the Excel file to be copied.Source_Folder: The folder path where the file currently exists.Destination_Folder: The folder where the file will be copied to.
Step 3: Creating the FileSystemObject
We initialize the FileSystemObject to perform the file copy operation.
Set FSO = CreateObject("Scripting.FileSystemObject")
CreateObject("Scripting.FileSystemObject"): Creates an instance of the FileSystemObject.
Step 4: Copying the File
This step copies the file from the source folder to the destination folder.
FSO.CopyFile Source_Folder & Source_File, Destination_Folder, True
FSO.CopyFile: Copies the file.Source_Folder & Source_File: Concatenates the folder path and file name to form the full source path.Destination_Folder: Specifies the destination folder.True: Allows overwriting the file in the destination folder if it already exists.
Step 5: Confirming Success with a Message
Finally, a message box confirms that the file transfer was successful.
MsgBox "We have transferred the file successfully"
MsgBox:This Displays a confirmation message after the file has been copied.
Full Code for Copying
Option Explicit

Private Sub Button1_Click()

    Dim FSO As Object
    Dim Source_File As String
    Dim Source_Folder As String
    Dim Destination_Folder As String

    ' Define the file and folder paths
    Source_File = "excelVba_firstClass.xlsm"
    Source_Folder = "C:\Users\Micheal\Desktop\initialFol\"
    Destination_Folder = "C:\Users\Micheal\Desktop\dasFol\"

    ' Create FileSystemObject
    Set FSO = CreateObject("Scripting.FileSystemObject")

    ' Ensure the file and folder paths are concatenated correctly
    FSO.CopyFile Source_Folder & Source_File, Destination_Folder, True

    ' Message to confirm success
    MsgBox "We have transferred the file successfully"

End Sub
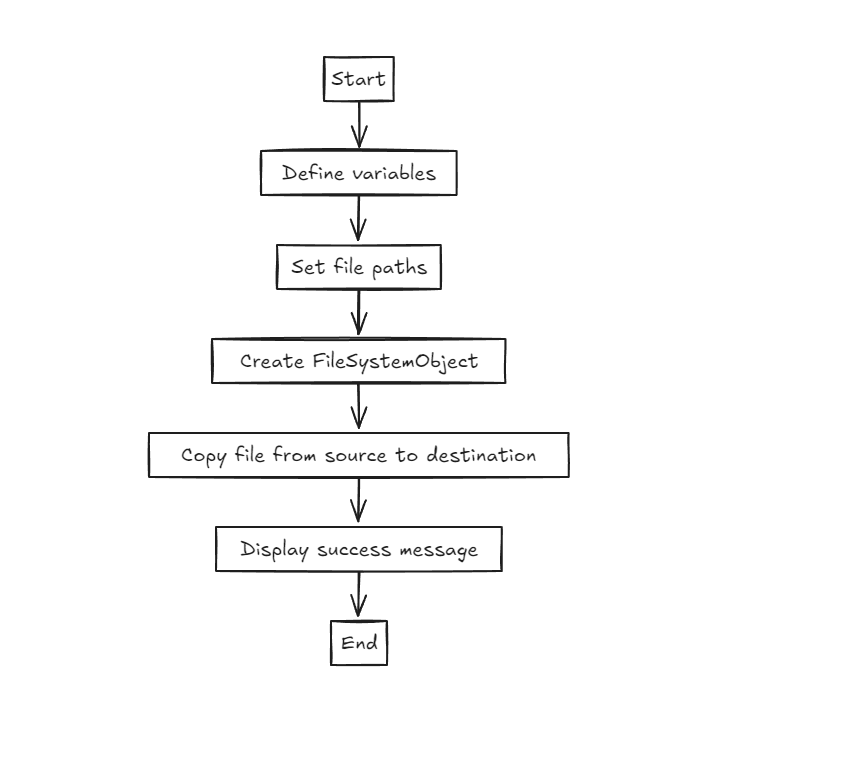
The flow chart of how the code runs

Expected Results
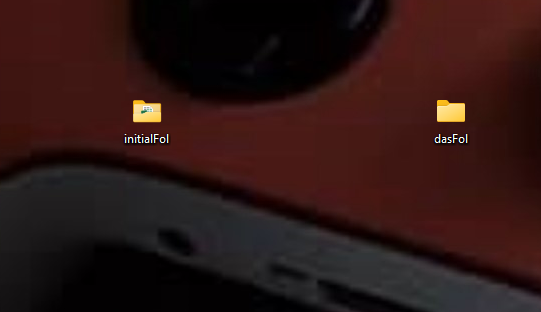
Before

And After

Once you have inserted the code and run it using the button, you should see the following:
- The specified Excel file (
excelVba_firstClass.xlsm) will be copied from the initialFol folder on your desktop to the dasFol folder. - Then a message box will pop up saying: “We have transferred the file successfully.”
- But If the file already exists in the destination folder, it will be overwritten.
NOTE: Please this is the best way i can show the out come😊😊
Troubleshooting .xlsm and .xlsx Files
- Incorrect File Path: Ensure that both the source and destination folder paths are correct. The file extension (
.xlsmor.xlsx) should match the actual file you are trying to copy. - File Type Differences:
- .xlsm: This file type contains macros. Ensure that the destination folder allows the use of macros if transferring
.xlsmfiles. - .xlsx: This file type does not support macros. If you are transferring an
.xlsxfile, ensure that no macros are required.
- .xlsm: This file type contains macros. Ensure that the destination folder allows the use of macros if transferring
- Permission Issues: If you encounter permission errors, check whether the source or destination folder requires administrative privileges.
Conclusion
This VBA code automates the process of copying Excel files between folders, saving time and effort when managing multiple files. It supports both .xlsm and .xlsx files and can help reduce errors while organizing your Excel files across directories.
Resources
For more information about using VBA in Excel, visit Microsoft’s official VBA documentation. and Pillow
if you like this blog post on How to Copy Excel Files Between Folders Using VBA in Excel, then you would love our other blog post on How to Use VBA to Input Data from a User Form into Excel

